J-Engine 410cc Thread

Question. In the Service manual for the 350 Classic, it shows torquing the cylinder bolts to 15nm, then 35nm and then an additional 150 degrees.
Am I reading that correctly?
And I'm reusing my bolts, I have upgraded other motors in the past reusing head and cylinder bolts without any problems.
Anyone run into any issues doing the same procedure?
 

Attachments

  • Image 10-20-24 at 12.12 PM.jpeg
    Image 10-20-24 at 12.12 PM.jpeg
    372.9 KB · Views: 23
The bolts stretch apparently, I would follow the book.
 
Anyone run into any issues doing the same procedure?
we (in India) re-use the bolts several times. Never had an issue. But they are cheap. So its more an availability issue than a money issue.
I have a bunch on order since a while (not for me, for a "concerned" friend) and the distributor takes his sweet time.
 
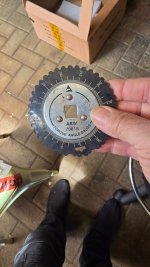
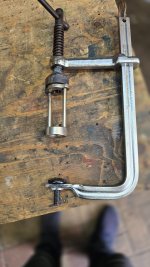
YES, I had never heard about this tool, so when Ranjeet tried to explain it in his version of English I still did not get it but seeing the picture it becomes clear. Basically an alternative to a torque wrench - right?
 
Not exactly a replacement, just enables an accurate number of degrees to be turned after a certain point is reached.
Whether by tension wrench or previous marks made.
 
OK thanx, in parallel I also asked chatgpt and here is that answer:

If you're referring to angular torque applied in degrees, it sounds like you're talking about a tool like a torque angle gauge or a torque angle wrench.

These tools are used to apply a specific angle of rotation after a certain initial torque has been set, often in applications like assembling engines or other mechanical components.

Here's how it works:

  1. Initial Torque: You first apply a specified torque using a regular torque wrench to get the fastener snug.
  2. Angle Specification: After reaching the initial torque, you then use the torque angle gauge or wrench to turn the fastener an additional specified number of degrees (for example, 90 degrees).
This method is crucial for ensuring proper clamping force and alignment in high-stress applications.
 
I finished the bike today. Cranked her up and noticed she sounded a little more chuggy.? After while she sounded better.
Got the bike out for a 25 mile ride.
Definitely a noticeable difference in the mid range, feels like there is more torque, I hooked up small digital tach and kept the RPMs down under 3500.
I did keep the Power Cam and FuelX Lite installed.
I'm at a mile above sea level, I rode a little into the mountains to get a sense of power and it did feel better in the twisty's.
If your at sea level, one might feel a great bit more power off the line.
So far, I'm happy with the results.
On a side note, I think the supplier should offer a cam chain tensioner gasket with the kit and option to buy new cylinder bolts to meet the RE requirements as per manual.
I'll update again in a few hundred miles.
 
Last edited:
My turn to do the 410 mod, bike ( Bullet) is nearly ready for its first Dyno to get a Base line.
I do the first Dyno because I want to know what my bike makes on the said Dyno machine, although maybe this figure has been produced by others I feel it is not relevant to my purposes as all Dyno machines read slightly different and I want an exact figure to relate my future mods to.
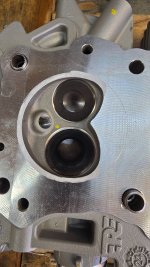
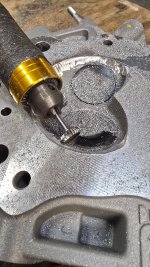
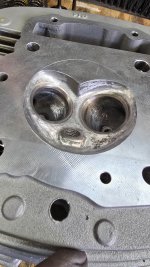
First job for my purposes is to "match" the Combustion chamber to the larger bore.
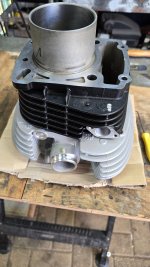
Head is sat upside-down and the new cylinder positioned using just the Dowels.
Scribing the head with something sharp I now have the diameter marked on the Head( in this case I am using a new head so I can keep riding).
I use a rotary drill, a Dremel would do the job but this unit is more powerful and will outlast a Dremel also it has a 3 jaw chuckle unlike a Dremel.

20241228_144650.jpg
20241228_144705.jpg
20241228_144826.jpg
First cut
20241228_150001.jpg
Finished job
20241228_152401.jpg

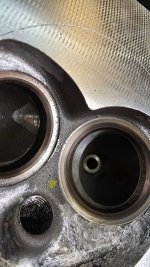
My next job will be to remove the Valves( I left them in to protect the Valve Seats ) and recut the seats to my own preference.
I prefer to use the interference angle system and will use a hand held cutter to Crown and Throat the seat to position the contact area.
My opinion on Lapping is mostly disputed by keyboard warriors on some forums and I choose to ignore their bleating and use my system.
Pics of the Valves/Seats to follow.
 
Before

20241229_112034.jpg

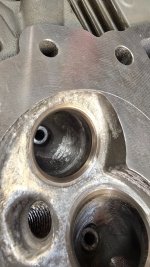
And after

20241229_122741.jpg

Ports de dagged and matched to the valve inserts.
De shrouded the Valves,
20241229_122832.jpg

20241229_122853.jpg
Made a bespoke( not often get to use that word!) Valve spring compressor.

20241229_101425.jpg
 
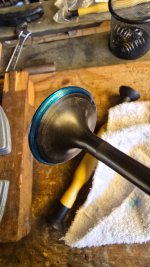
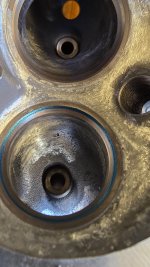
Using oil paint from the Craft store ( Bearing Blue is not easy to obtain these days ) I have smeared a small amount on the Valve face.
Then using what some may refer to as a Lapping tool I have inserted the Valve into the Head and rotated it leaving behind an indication of seating contact area.
20241230_101330.jpg
The Valve also shows an indication.
20241230_101626.jpg
Basically where they touch the Blue comes off and stays on the Head/Valve seat.
I now have to wait for the correct sized (6mm) arbor to arrive that will enable me to change the position of the contact on the Valve.
My preference ( although what is shown here is adequate ) is for a thinner contact line and one that is closer to the Stem which will in effect raise the Valve out of the Seat.
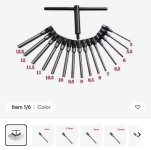
Screenshot_20241230_104432_AliExpress.jpg
This tool holds the cutting tip that will "Crown" ( cut the top ) of the Seat, as you may be able to determine,the tool is inserted into the Valve Guide with various different angled cutters held at 90deg.
The Seat contact area is cut to 45deg so I will be using a 30deg cutting angle to Crown the seat and bring the Valve contact area closer to the valve stem.
Had I wanted to go the other way I would be using a larger angle such as 70deg and "Throating" the seat.
When finished I will NOT be lapping the valve with grinding paste !

Another advantage of a thinner seat contact area is that the Pressure holding the Valve to the seat is greater.
Same Force on less Area equals more Pressure.

P = F/A can't argue with Physics ;)
 
Last edited:
Back
Top